
Advanced Tweening
Tweening is one of the handier functions of Ulead GIF Animator 5. "Tweening" is creating or updating the frames "in between" two main frames. You can tween one object to move it across your canvas, or tween the transparency of an object to make it appear to fade in and out. Or both at the same time...
In this tutorial, we will take an existing animation of a red dragon flying in place and add it to our own. We will then use the Tween function to make it move across our canvas, as if soaring across the skies...
We will start with the image on the left and end up with the one on the right:


To start, save the image on the left to your hard drive. You will also
need to save this animation to your hard drive:
 This
animation is from
www.animationlibrary.com. The original animation has 8 frames; I
modified it to 24 frames for this tutorial to simplify things for those
new to tweening.
This
animation is from
www.animationlibrary.com. The original animation has 8 frames; I
modified it to 24 frames for this tutorial to simplify things for those
new to tweening.
Open Ulead GIF Animator 5. Click the Open icon
![]() and
choose the main background from above that you saved on your computer.
and
choose the main background from above that you saved on your computer.
 Click
the Add Image icon
Click
the Add Image icon
![]() and select the red dragon animation. Make sure that "Insert in current
frame" and "Distribute to individual frames..." are selected at the bottom
of the Add Image dialog box:
and select the red dragon animation. Make sure that "Insert in current
frame" and "Distribute to individual frames..." are selected at the bottom
of the Add Image dialog box:
You should now see the following in GA 5:
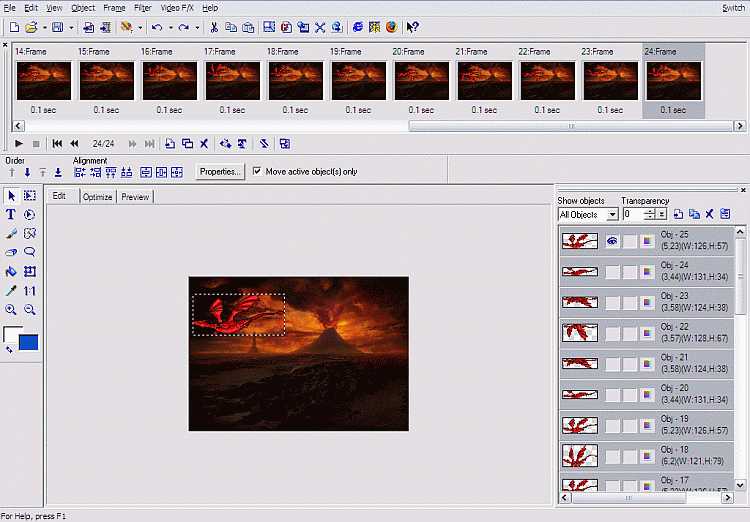
All the objects from our added image should be highlighted in the Object Manager. The last frame of the animation should also be highlighted in the Frame Panel.
Our next step is to move these individual objects. Make sure "Move active object(s) only" is checked in the Attribute Toolbar. Click and drag these over to the left side of the image, so just the right border is showing.
Next, on the Frame Panel select Frame 1 only. You should now see this on the Workspace:
All the dragon objects should still be highlighted on the Object Manager. Now click and drag the dragon on the workspace all the way to the right, so that just the right border is showing.
Now we will use that lovely Tween button
![]() on the bottom of
the Frame Panel. Make sure that the Object Manager still shows all the
dragon objects selected, and no others.
on the bottom of
the Frame Panel. Make sure that the Object Manager still shows all the
dragon objects selected, and no others.
When you click on it, a dialog box will appear. We must set the start frame as 1, and the end frame as 24. We will need to use "Update intermediate frames" as our frame generation method.
Click the "Objects" tab and select "Currently selected objects" and "Position." Now click "OK" to set the tweening in motion.
 The
original dragon animation has a frame delay of 5 per frame. You may wish
to change the delay in your animation to this as well, or use another value that is more
to your liking. I used a value of 10 in the one shown below.
The
original dragon animation has a frame delay of 5 per frame. You may wish
to change the delay in your animation to this as well, or use another value that is more
to your liking. I used a value of 10 in the one shown below.
To change the frame delay for all frames, click on Frame 1. Next, hold the Shift key and click on Frame 24. This will highlight all the frames. Right-click on the selected frames to bring up the Frame Panel commands menu, and click on Frame Properties. Change the delay to the value you want, and keep the removal method as "Smart." Then click "OK."
Clicking the Preview Tab of the Workspace will reveal your completed animation...
You can now optimize your animation as you see fit. I optimized mine at 32 colors.
I hope you enjoyed this tutorial and learned something from it. Happy Animating!
For my tutorial on Ulead GIF Animator 5's basics, click the following
banner...
![]()
![]()
![]()
![]()