
| Home | Tutorials | Animations | PC Security | Links | Downloads | About |
Welcome to the new frameless CSS-powered animation samples page!
Hover over a thumbnail on the right to view the animated version.
The frameset version has been removed.
Visit the iframe version if this page doesn't display quite right for you.

 Having some fun here with an animation, a still image, and JavaScript...
 Go Jets Go!
 Another take at Metallica's logo. Like the one further down the thumbnails, the Metallica logo was made with Corel Motion Studio 3D. Added the "grow" effect. The lightning was made with the Alien Skin Xenofex 2 Photoshop plug-in, Electrify effect. The glow was done with Ulead GIF-X 2.0.
 A revision of my previous Winnipeg Jets 3D logo.
 3D text and fireworks made with Corel Motion Studio 3D. Animation finished up with Ulead GIF Animator 5.5. The font used is "Biohazard Participants."

 #ForTheW
 #ForTheW
 Another take at Metallica's logo. The lightning was made with the Alien Skin Xenofex 2 Photoshop plug-in, Electrify effect. The glow was done with Ulead GIF-X 2.0.

 One day many years ago, I was playing around with a Richard Rosenman filter (3d Sphere Generator v1.5) and got an idea.
 Yes, another Winnipeg Jets animation. This animation makes use of a nice Photoshop plugin to make that lightning-like effect.
 #ForTheW
 #ForTheW
 They should have changed the logo, check the calendar...
 3D text and fireworks made with Corel Motion Studio 3D. Animation finished up with Ulead GIF Animator 5.5. The font used is "Biohazard Participants."
 #ForTheW
 I took a stab at making a 3D logo using Corel Motion Studio 3D. Not exactly what I wanted for a final result, but it will do for now.

 #ForTheW
 The Winnipeg Jets logo.
 On November 20, 2006, the world lost a fine animator and a great man.


 There was a problem with this error message.
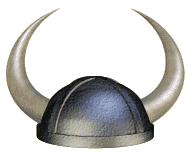
 The latest installment in the Viking-Wizard wars...
 Created with Ulead GIF Animator 5, using the Banner Text function.
 The phases of the moon.
 Ulead COOL 3D PS was used to create two different globes - a day version and a night one. I used Ulead GIF Animator 5 to combine the two.
 Way back when on the Animation Station Forum, one of the members went by the name "Boopalotta." She was a Betty Boop fan.
 Just having a bit of fun here. I used the UFO and the moon I made with Ulead COOL 3D Production Studio. The animation was assembled in Ulead GIF Animator 5, of course.
 The moon was made with Ulead COOL 3D Production Studio, then the animation was tweaked with Ulead GIF Animator 5.
 This flaming sword was made with Ulead COOL 3D 3.5. Animation tweaked with Ulead GIF Animator 5.
 One of my favorite metal bands, Savatage. The text object was made with COOL 3D Production Studio, and saved as a transparent .tga file.
 The text object was made with COOL 3D Production Studio.
 Text and zeppelin done in Ulead's COOL 3D Production Studio, then tweaked and animated with Ulead GIF Animator 5 and a plug-in filter from Xenofex.
 The Ring was made with COOL 3D Production Studio. The inscription texture used in C3DPS was made with Photoshop 5.5 and Ulead GIF Animator 5.
You can find the font used at my Downloads page. The site the font creator, Johan Winge, had it hosted on is no longer available.
The Ring was made with COOL 3D Production Studio. The inscription texture used in C3DPS was made with Photoshop 5.5 and Ulead GIF Animator 5.
You can find the font used at my Downloads page. The site the font creator, Johan Winge, had it hosted on is no longer available.
 Constructed with Ulead's COOL 3D Production Studio, tweaked a bit with Photoshop CS2, some plug-in filters, and animated with Ulead GIF Animator 5.
 More fun with COOL 3D PS.
 More fun fiddling with COOL 3D PS. The lighting effects are most neat!
 Someone dared me to make a lavalamp. So I did. I'd made a simple one way back when, but this time we went for a bit more.
 The PhotoImpact International forum unveiled a new banner (still image), and I just had to do an animated version.
 Just having some fun with Ulead COOL 3D Production Studio.
 I got carried away. I started off revisiting that globe animation from long ago... The editing was done mostly in GIF Animator 5.
 More fun playing around. Just like the animation above this one on the thumbs list.
 The text was made with PhotoImpact XL, and the sparkle effect done in Ulead GIF Animator 5 with the help of Harry's Filters.
 This uses the pumpkin I made a couple years ago with PhotoImpact XL. PhotoImpact's Z-merge feature comes in handy.
 This is a variation on the animated pen signature... Chalk and a chalkboard instead as you can plainly see. I decided to use Photoshop 5.5 do make the lettering,
freehand. It has nice brushes for such things.
This is a variation on the animated pen signature... Chalk and a chalkboard instead as you can plainly see. I decided to use Photoshop 5.5 do make the lettering,
freehand. It has nice brushes for such things.
 This was done with Ulead COOL 3D PS, Paint Shop Pro 7 with a couple plug-in filters, and Ulead GIF Animator 5. I'm not normally one to do sparkly things, but the
Animation Station forum is doing a thing on them... so I joined in.
This was done with Ulead COOL 3D PS, Paint Shop Pro 7 with a couple plug-in filters, and Ulead GIF Animator 5. I'm not normally one to do sparkly things, but the
Animation Station forum is doing a thing on them... so I joined in.
 This was done with Ulead GIF Animator 5 and a plug-in to do the burnt edges effect.
 This was done using Ulead's COOL 3D PS, GIF Animator 5, plus GIF-X 2. for the scan effect.
 This was an awful lot of work...
 This is my simplified version of the tutorial, Lost in the 50's Signature Tut (Owned & Written by C. File 11/3/04). Click the thumb to see the tutorial.
 This is my comeback to a little string of animations (click the thumb to see them). Another storyline in the seemingly never-ending Viking-Wizard wars at the old
Animation Station Forum at PhotoImpact International. Those fun posts are no longer available. There are a few in this series...
This is my comeback to a little string of animations (click the thumb to see them). Another storyline in the seemingly never-ending Viking-Wizard wars at the old
Animation Station Forum at PhotoImpact International. Those fun posts are no longer available. There are a few in this series...
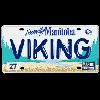
 This was just for fun. The plate graphics I found at R.T.'s Blank Plates. The site doesn't appear to be active anymore.
 This was inspired by "Cat" from South Dakota. She made the original animation from a tutorial for Paint Shop Pro/Animation Shop, and was wondering how to do that in
PhotoImpact. A bunch of us at the PhotoImpact International forum and I redid the "breathing" effect with our own methods.
This was inspired by "Cat" from South Dakota. She made the original animation from a tutorial for Paint Shop Pro/Animation Shop, and was wondering how to do that in
PhotoImpact. A bunch of us at the PhotoImpact International forum and I redid the "breathing" effect with our own methods.

 I actually have the fonts for the first two - "Metal Lord" and "Lady Starlight." For the Judas Priest logo, I snagged the image off their
website, reduced it, removed the background and added the light scan effect. The Black Sabbath one, since they never seemed to pick a certain font or logo, I just
used what seemed like a good idea at the time...
I actually have the fonts for the first two - "Metal Lord" and "Lady Starlight." For the Judas Priest logo, I snagged the image off their
website, reduced it, removed the background and added the light scan effect. The Black Sabbath one, since they never seemed to pick a certain font or logo, I just
used what seemed like a good idea at the time...


 The balloon was made with Ulead COOL 3D 3.5, then animated, resized and optimized with Ulead GIF Animator 5.
 This was done in Ulead COOL 3D 3.5, and cleaned up and optimized with Ulead GIF Animator 5.
 This was another for the fun of it.
 This was one of those things that started off as fiddling around. I'd downloaded a huge package of graphics from the Perfect Dark Zero website Fan Sites page
(no longer available) and finally got around to checking it out. I looked at a few items, and got an inspiration...
This was one of those things that started off as fiddling around. I'd downloaded a huge package of graphics from the Perfect Dark Zero website Fan Sites page
(no longer available) and finally got around to checking it out. I looked at a few items, and got an inspiration...
 This shows what you can do with tweening. Rather handy function, it is.
 The main Savatage graphic was made with Ulead COOL 3D 3.5. The flames were done with Ulead PhotoImpact XL. All other editing and cleanup was done with Ulead GIF
Animator 5.
The main Savatage graphic was made with Ulead COOL 3D 3.5. The flames were done with Ulead PhotoImpact XL. All other editing and cleanup was done with Ulead GIF
Animator 5.
 This Metallica banner was made with Ulead COOL 3D 3.5. All other editing and cleanup was done with Ulead GIF Animator 5. The old Metallica logo... inspired by their
Ride The Lightning album. I saw these guys in concert back in the mid '90's. Awesome show!
This Metallica banner was made with Ulead COOL 3D 3.5. All other editing and cleanup was done with Ulead GIF Animator 5. The old Metallica logo... inspired by their
Ride The Lightning album. I saw these guys in concert back in the mid '90's. Awesome show!
 The flashlight was made with Ulead COOL 3D 3.5. The light effect is courtesy Paint Shop Pro 7. All other editing and cleanup was done with Ulead GIF Animator 5.
 The speakers were made with Ulead GIF Animator 5, using Richard Rosenman's Punch plug-in filter to move the speakers. The stereo is a tweaked Winamp classic skin.
I got lazy and didn't feel like drawing a stereo from scratch. Maybe later...
The speakers were made with Ulead GIF Animator 5, using Richard Rosenman's Punch plug-in filter to move the speakers. The stereo is a tweaked Winamp classic skin.
I got lazy and didn't feel like drawing a stereo from scratch. Maybe later...
 The padlock is made with Ulead PhotoImpact XL, animated and tweaked with Ulead GIF Animator 5.
 Just playing around with the eyes. Timing is everything...
 Another episode in the Viking-Wizard wars...
 From an amusing tutorial for Photoshop, but easily done in GA 5. Tweening makes it fly from one side to the other.
 This is a modified version of the hollow globe I made previously. Look a little further down the thumbnail list.
 Monitor from COOL 3D preset, biohazard symbol from a wingding font (can't recall which one!). The rest was drawn and animated with GA 5. Just for the heck of it.
 The water area was carefully traced with the lasso tool, and then copied three times. Photoshop was used to distort those copies slightly.
 Picking on the wizard again.
 What you can do with tweening...
 This is from a tutorial by Maggie. Her MaCo Graphics site is no longer up, unfortunately, so the tutorial is no longer available.

 Another episode in the Viking-Wizard wars...
 This was a just-for-fun thing to do. The numbers were made as a text-ring animation with the banner wizard in Animation Shop 3. That was opened in GA 5, which converts
the individual optimized frames to objects. A motion blur plug-in was used to blur some of the text.
This was a just-for-fun thing to do. The numbers were made as a text-ring animation with the banner wizard in Animation Shop 3. That was opened in GA 5, which converts
the individual optimized frames to objects. A motion blur plug-in was used to blur some of the text.
 The majority of this was made with Ulead COOL-3D 3.5. The candle was found on the web, and the flame I also made with COOL-3D.
 The pumpkin I made with Ulead PhotoImpact XL, the background is from www.3dtotal.com.
 I was playing around with a Richard Rosenman filter (3d Sphere Generator v1.5) one day, and got an idea.
 This was made using GIF-X 2 Plugin and GA 5. The page is a scan of something I wrote using J. R. R. Tolkien's Elvish alphabet, the Tengwar. (I do calligraphy, too.)
 Ain't it the truth?
 The water ripples were made with a program called Reflet.
 Just for fun...
 This shows what you can do by adjusting the transparency setting on the Object Manager, and tweening with that handy "Tween" function on the Frame Panel.
 No matter what Microsoft comes up with for an operating system, there are always critical updates and patches for the security holes and flaws that are discovered.
 This was easy! I used the "Burger-Char" Video F/X plug-in, which you can download from my Downloads page (Burger's Transitions).
 This animation uses the "Tween" effect to move the balls. The "Transform" tool was used to rotate the "8" in the middle of the 8-ball.
The balls don't actually rotate, as the lighting highlights would look wrong.
This animation uses the "Tween" effect to move the balls. The "Transform" tool was used to rotate the "8" in the middle of the 8-ball.
The balls don't actually rotate, as the lighting highlights would look wrong.
 This was fun to do!
 I made the UFO with Ulead COOL 3D. The background is a digital creation I made long ago with something called Genesis II.
 This was drawn and animated with GA 5, and bevelled in Paint Shop Pro 7 for a 3D look.
 This is another example of the Hue & Saturation effect in the Video F/X menu.
 Explosion effect by Ulead Cool 3D v. 3.5.
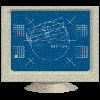
 This animation uses the Power Off-F/X effect found under Video F/X on the Standard toolbar, in the F/X sub-menu. The effect is used twice in this animation.
 "VIKING" text object was made, positioned, then the Split Text was used to make a text object for each letter. Each text object then selected on the
Object Manager, and the Distribute to Frames function used.
"VIKING" text object was made, positioned, then the Split Text was used to make a text object for each letter. Each text object then selected on the
Object Manager, and the Distribute to Frames function used.
 This is simple Banner Text with the Neon effect, with the text set as transparent.
 Click the thumbnail to see the tutorial!
 This is a simple animation. It was assembled from bitmap images in an old chess program.
 Made by starting with a blank animation, then adding the guy at the PC and the file folder with Add Image. Then Banner Text is added (click the first frame before
you click Add Banner Text). Neon was the effect used, as you can see.
Made by starting with a blank animation, then adding the guy at the PC and the file folder with Add Image. Then Banner Text is added (click the first frame before
you click Add Banner Text). Neon was the effect used, as you can see.
 Text was made using a two-color gradient. Then the Video F/X Hue & Saturation (found under Darkroom) effect was used.
 The dreaded "pen siggy" - the concept is simple. Start with text, duplicate it, erase a little bit, move the pen. Repeat until the name is completely erased.
Reverse the order of all the frames. Done.
The dreaded "pen siggy" - the concept is simple. Start with text, duplicate it, erase a little bit, move the pen. Repeat until the name is completely erased.
Reverse the order of all the frames. Done.
 This little porker started life as a still jpeg picture. I used GIF Animator 5's lasso tool to trace around his arm. I then cut and pasted, which gave me a new object.
I also cut & pasted the eyebrows and that thing at his elbow.
This little porker started life as a still jpeg picture. I used GIF Animator 5's lasso tool to trace around his arm. I then cut and pasted, which gave me a new object.
I also cut & pasted the eyebrows and that thing at his elbow.
 This animation features banner text with the zoom-in entrance and fade-out exit.
 A simple animation... The pumpkin is a text object made with a Hallowe'en Wingding font. It was beveled in Photoshop.
 This is similar to the dragon animation eight up the list from this one. This was easier, though, as no lasso tool was needed.
 Made entirely with GA 5.
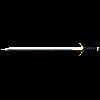
 Believe it or not, the sword was drawn with GA 5. It consists of four objects - the blade, the hand guard and pommel, the grip, and the groove in the blade.
It was then taken to an external image editor. Paint Shop Pro's Sculpture effect was used to give the metal parts their shiny, 3D look. A texture fill
and bevel fleshed out the grip. The animated lighting effect was done with Ulead's GIF-X 2 Plugin. The effect I used is "Scan."
Believe it or not, the sword was drawn with GA 5. It consists of four objects - the blade, the hand guard and pommel, the grip, and the groove in the blade.
It was then taken to an external image editor. Paint Shop Pro's Sculpture effect was used to give the metal parts their shiny, 3D look. A texture fill
and bevel fleshed out the grip. The animated lighting effect was done with Ulead's GIF-X 2 Plugin. The effect I used is "Scan."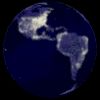
 This was made the hard way. A jpeg picture of the earth was opened in GA 5. The oval selection tool was used to make a circular selection area. Then copy and paste
made a new object of what was in the selection area. The selection area is then moved over a few pixels, and you copy and paste again. Repeat...
This was made the hard way. A jpeg picture of the earth was opened in GA 5. The oval selection tool was used to make a circular selection area. Then copy and paste
made a new object of what was in the selection area. The selection area is then moved over a few pixels, and you copy and paste again. Repeat...
 Web Animation 2 was the MSN Community/Group site that helped fuel my animation addiction... This is one of the logos I made for it.
 This combines two animations - a basic neon banner text with the ring animations.
 OK, I'm picking on Microsoft. Who doesn't? A small price for Microsoft to pay for a huge share of the market...
 Very basic animation to pay tribute to a great piece of freeware. Composed in GA 5, bevelled in Photoshop.
 This is a simple animation, once you learn GA 5's tools.
 This is a more detailed and thus harder to make typewriter animation.
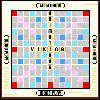
 OK, this one was lots of work.
All animations made with Ulead GIF Animator 5. Some images edited or created with Corel Motion Studio 3D, Adobe Photoshop 5.5 or CS2, Jasc Paint Shop Pro 7,
IrfanView, Ulead COOL 3D, Ulead PhotoImpact XL and/or Ulead GIF-X 2 Plugin.
© 2002-2024 by Viking. This web
page may not be republished, in whole or in part, in any form without written
permission from the author.
All Rights Reserved.
![]()