
Workspace | Ulead GIF Animator 5 Basics
The Workspace is where you will watch your animation come to life. There are three tabs here: Edit, Optimize, and Preview. The Edit tab takes us to where we will be doing most of our work.
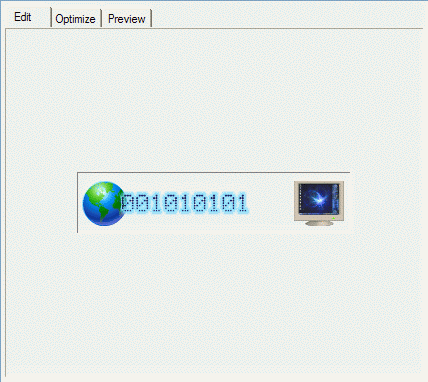
Edit Tab
The image shown in the workspace is that of the frame you have selected in the Frame Panel. The Object Manager Panel will show the little eye icon in all the objects that are visible in the frame, and highlight the object that is currently selected as the active object. The active object is the one you are editing in the workspace.
In the workspace you can:
- use the pick tool to select, drag and position objects
- click here with the text tool to add text
- use one of the selection tools to select an area of the image or object
- use the paintbrush or eraser
- fill an area with the fill tool
- use the eyedropper tool to pick a foreground color
- transform an object with the transform tool
Preview Tab
The Preview tab will show you your animation as it will appear on the Web. For this "Web preview" to work, you must have Internet Explorer 4.0 or higher, or Windows 98 or higher. If you don't have Internet Explorer 4.0 or above then the Preview tab may not appear.
If you click on the preview tab before you have optimized your animation, there will be a delay as your animation is optimized according to the settings currently used in the Optimization tab (see below). If you have not modified any settings in the Optimization tab in your session, then the default preset is what is used.
Note: You can also preview your animations by clicking a browser button on the Standard toolbar to have GIF Animator invoke external browsers. Customize these buttons in the Preview tab of the File: Preferences menu command bar.

Only one browser in addition to Internet Explorer (IE) and Netscape (remember Netscape?) can be added. If you have more installed, you'll have to go here to change it to view it in the other(s).
However: If you don't have Netscape installed (and who does these days?) but have two other browsers in addition to IE, you can uncheck the auto-detect option and manually browse to another browser, as shown in the image below. The Netscape icon will still be there, but in this example, Opera will open instead.

Of course, you can also substitute another browser in place of Internet Explorer - in the example image below, I've replaced IE with MS Edge, and Netscape with Firefox.

Again, the image you are viewing in the browser is optimized according to current settings in the Optimization tab.
Optimize Tab
The Optimize tab takes you to a new view of things. On the left, your original work. On the right is how it looks after optimization. For an inside look at what Optimization does, have a look at my Anatomy of a GIF tutorial.

Note the information in the top right - Download time. If you click the little modem icon just to the right, you can select speeds from 14.4 to 128 Kbps (Kilobits per second). This tells you how long it will take for your gif to be downloaded for a viewer on a website. (This feature definitly gives an indication of how old this software is - dial-up was the norm, not broadband speeds!) When you see a yellow warning rectangle just above this button, this means the optimized file size is greater than the original file size. If you had created your image from scratch, or loaded a UGA file, this will likely be on.
Note that the Tool Panel's functions are disabled except the view tools and color tool buttons. You may still zoom in or out, or change the foreground and background colors. You may also use the Frame Panel to change the frame properties, like frame delay or removal method. You may move frames only if you use the click-and-drag method; this command is disabled on the Standard Toolbar.
There is known bug in GA 5 that will sometimes cause GA 5 to freeze or crash when you go to the Optimize Tab. This seems to only occur when your
animation is of a large area, such as 800 x 600 pixels, (or you are zoomed in on a smaller animation) and the Auto-Optimize feature is on (covered below).
To avoid this crash, just use the zoom out tool ![]() on the Tool Panel to shrink
the image down to a smaller size. The smaller the better, just to be safe. Don't forget to save your animation in UGA format before you try
optimizing, just in case!
on the Tool Panel to shrink
the image down to a smaller size. The smaller the better, just to be safe. Don't forget to save your animation in UGA format before you try
optimizing, just in case!
Two buttons are at the bottom right: Optimize Now and Save. The Optimize Now button is disabled when the Auto-Optimize button
![]() (third from the right on the attribute toolbar) is selected.
The Save button lets you save the optimized gif on your computer.
(third from the right on the attribute toolbar) is selected.
The Save button lets you save the optimized gif on your computer.
The Attribute toolbar for the Optimization tab is below.
![]()
There are Presets from which you can choose the number of colors that you would like to include in the Global Palette. These Presets are broken into two types, Line Art and Photo which range from 16 - 256 colors. Line Art is particularly useful when your animations consist mainly of solid objects and colors, while the Photo settings are more suited towards images that contain a large number of varying shades. By default, the GIF Animator uses the Photo 256 preset, which can be changed from the Optimize tab in the Preferences dialog box [F6].
![]() The button next to the Preset drop-down is for adding an Optimization preset.
This button becomes active once you have changed any setting in the existing preset you were working with. The button next to that (
The button next to the Preset drop-down is for adding an Optimization preset.
This button becomes active once you have changed any setting in the existing preset you were working with. The button next to that (![]() ) will delete a preset.
) will delete a preset.
Next in line is the color setting. You can set the number of colors ![]() in the global palette from 2 to 256. More colors gives better image quality and higher file size, while fewer reduces file size at the expense of image quality,
unless your animation has very few colors.
in the global palette from 2 to 256. More colors gives better image quality and higher file size, while fewer reduces file size at the expense of image quality,
unless your animation has very few colors.
Dither is a method of creating new shades or colors from a pattern of pre-existing shades or colors. Setting the dither value at 100 gets the best color gradient result for photo realistic images. Setting it at 0 works best for line art images. When working with file size constraints, it's best to set dither at a low value. The normal dither values for UGA 5's presets are 100 for photo and 0 for line art.
![]() The next icon button is the Auto Remove Garbage Pixels feature.
This function works in conjunction with dithering. When dithering is used in optimizing, the resulting optimized image may have some "noise" in it.
Press this button to have UGA 5 automatically discard the noise in the optimized image (recommended).
The next icon button is the Auto Remove Garbage Pixels feature.
This function works in conjunction with dithering. When dithering is used in optimizing, the resulting optimized image may have some "noise" in it.
Press this button to have UGA 5 automatically discard the noise in the optimized image (recommended).
Lossy removes pixels from the image, based on the value that you enter. The higher the value, the more pixels will be removed, and the smaller the resulting file size. It also reduces image quality - a lossy value of 100 can to give a very grainy image. Not recommended for all animations, but if small file size is important it is an option.
![]() A matte is used to define an area that you want to make transparent. The image at
the beginning of this paragraph shows "None." Choose a background color, select an image, or choose "none" for your mask area.
A matte is used to define an area that you want to make transparent. The image at
the beginning of this paragraph shows "None." Choose a background color, select an image, or choose "none" for your mask area.
Note that if the Transparency button is depressed (see below) the matte color will appear as a slight fringe around your image. If your animation has transparent areas, you will find that if you use a white matte (the default) and put your animation on a web page with a black background, you will get a greyish white fuzzy rim on your gif. Your gif would appear fine on a white web page. "None" is usually the best to use for the matte if you want a transparent gif that may be displayed on a variety of backgrounds..
- White fills transparent areas with white.
- Black fills transparent areas with black.
- Foreground Color fills transparent areas with foreground color.
- Background Color fills transparent areas with background color.
- Custom Color fills transparent areas with a color of your choice. Click the color square to open the Ulead Color Picker.
- Image File fills transparent areas with an image of your choice. Enter the name of the file or click Browse to search for the file. The image file is NOT saved as a background for the gif, but portions of it may appear in your animation.
- None fills transparent areas with white, unless you turn on the Transparency just to the right of Matte. Then no color is used as a matte. This is the setting to use if you want a transparent background.
If you have the Transparency button turned off, then the matte color (or image, if selected) becomes the background. If the matte color is 'none' and transparency is off, then the background defaults to white.
![]() Transparency. The button to the right of Matte switches Transparency on or off.
I almost always leave this on, using an object as a background when desired. If you want to save your gif file with a transparent background, then this button
must be activated.
Transparency. The button to the right of Matte switches Transparency on or off.
I almost always leave this on, using an object as a background when desired. If you want to save your gif file with a transparent background, then this button
must be activated. ![]()
![]() This is the Optimization Wizard button. This will take you
step by step through the optimization process, letting you select how you want to optimize your animation. Play around with it a bit. It does no more than can be done on
the Optimization Panel, but some people may find it a nice feature.
This is the Optimization Wizard button. This will take you
step by step through the optimization process, letting you select how you want to optimize your animation. Play around with it a bit. It does no more than can be done on
the Optimization Panel, but some people may find it a nice feature.
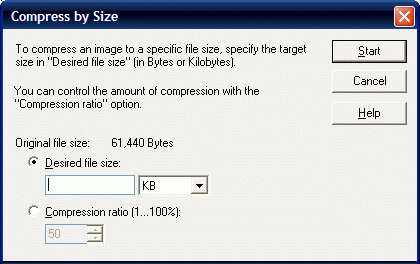
![]() Compress by Size - This allows you to compress your animation by file size. The first option
lets you set the file size in kilobytes, the second by compression ratio. If you choose compression ratio, the lower the number you use the smaller the file size.
Note that this is not usually useful if your image was a UGA file (including an animation you just made from scratch) as .uga files are rather large in size; this is
the size that UGA 5 will be using as a comparison. If you are optimizing a .gif file you opened, this will be much more useful. Try this feature out and experiment
for yourself.
Compress by Size - This allows you to compress your animation by file size. The first option
lets you set the file size in kilobytes, the second by compression ratio. If you choose compression ratio, the lower the number you use the smaller the file size.
Note that this is not usually useful if your image was a UGA file (including an animation you just made from scratch) as .uga files are rather large in size; this is
the size that UGA 5 will be using as a comparison. If you are optimizing a .gif file you opened, this will be much more useful. Try this feature out and experiment
for yourself.
![]() The next button is the Auto-Optimize button. When depressed, this
automatically optimizes your gif whenever you make a change on the attribute toolbar. If this was depressed the last time you used the Optimize tab in the workspace,
it will automatically optimize your animation whenever you click on the Optimize tab after making any changes in the Edit mode.
The next button is the Auto-Optimize button. When depressed, this
automatically optimizes your gif whenever you make a change on the attribute toolbar. If this was depressed the last time you used the Optimize tab in the workspace,
it will automatically optimize your animation whenever you click on the Optimize tab after making any changes in the Edit mode.
![]() The second last button will show or hide the Optimize
Panel. I rarely use this, and you likely won't need to use it either. Most settings here can be left as default. But here is what it does in case you
really want to know...
The second last button will show or hide the Optimize
Panel. I rarely use this, and you likely won't need to use it either. Most settings here can be left as default. But here is what it does in case you
really want to know...
 The palette drop-down will let you pick from three choices:
Optimized, Web 216, or User Defined. Optimized is recommended. Web 216 will use the "web safe" palette of 216 colors, which may not work well with all
animations. User Defined uses a palette you have composed. I always use optimized, as this usually gives the best result.
The palette drop-down will let you pick from three choices:
Optimized, Web 216, or User Defined. Optimized is recommended. Web 216 will use the "web safe" palette of 216 colors, which may not work well with all
animations. User Defined uses a palette you have composed. I always use optimized, as this usually gives the best result.
Method lets you choose from median cut or minimum variance. Median cut is the default, and is usually fine to use. Minimum variance will attempt to keep the colors as close to the original as possible. This is not usually needed, as median cut keeps the colors reasonably close most times; but if not, then use minimum variance.
Weight gives you four options: Even, Red, Green or Blue. This determines which colors will be more favoured in the optimization process.
Web Snap determines how many colors will be shifted towards "web safe." A setting of 0 means none, and 100 is the maximum.
 Next is the Local Palette tab. This is
dependent on which frame you have currently selected on the Frame Panel. For a Global Palette, leave the top box unchecked. Checking this will preserve the
local palette for the currently selected frame. Checking the Preserve Local Palette will then allow you to check either of the other two remaining boxes. If you
check Local Palette for current frame, then you can choose an optimization preset for the current frame.
Next is the Local Palette tab. This is
dependent on which frame you have currently selected on the Frame Panel. For a Global Palette, leave the top box unchecked. Checking this will preserve the
local palette for the currently selected frame. Checking the Preserve Local Palette will then allow you to check either of the other two remaining boxes. If you
check Local Palette for current frame, then you can choose an optimization preset for the current frame.
As discussed earlier, it is usually best to leave your palette as Global Optimized, especially for animations with many frames, to keep the file size small.
 The Advanced tab lets you select to remove redundant pixels, interlace, and remove comment block.
Removing redundant pixels removes pixels that are identical from one frame to the next. This is the default setting, and should usually be left on.
Interlacing lets the image fade in gradually when downloading, so the viewer can see something while waiting for the image to finish loading. This is rarely used by anyone for animations.
The comment block is not always present in an animation. You will find that most trial or shareware animation programs automatically add a comment block which identifies the software. You can add your own comment block by clicking on "Edit, Global Information" on the standard menu. Any text in the comment block is never seen when viewing a gif - only when editing it with gif animation software, or viewing the gif file with a hex editor. Removing the comment block will reduce file size, but not by all that much. 104 bytes is all that is used by the comment block in the screen shot below. See also Global Information in the Standard Toolbar.


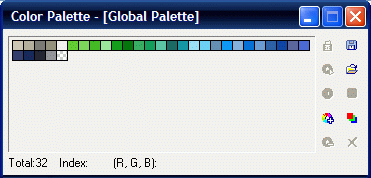
![]() The last button shows or hides the color palette. From this box you can edit, delete or add to the colors in your palette if necessary. Sometimes
optimizing will change a color too much, so you can change it here (or use the minimum variance setting on the palette tab). Before you optimize, you can select a
color you don't want changed during optimization. Hold the cursor over your animation and you will see the cells in the color palette highlight as you pass the cursor
over various colors. On the color palette, click on the color you want to keep, then click the little lock button at the top left.
The last button shows or hides the color palette. From this box you can edit, delete or add to the colors in your palette if necessary. Sometimes
optimizing will change a color too much, so you can change it here (or use the minimum variance setting on the palette tab). Before you optimize, you can select a
color you don't want changed during optimization. Hold the cursor over your animation and you will see the cells in the color palette highlight as you pass the cursor
over various colors. On the color palette, click on the color you want to keep, then click the little lock button at the top left.
Click a color cell and then hold your cursor over the various buttons to see what they are. Do some poking around with the palette. You won't generally need to use this feature, but it is there if you do.
Lastly, the error "Unable to finish the GIF Optimization process."
This error typically happens when you try to optimize a massive animation - dozens or hundreds of frames, and a wide variety of colors. This is mostly likely to happen if you're trying to make a gif from an imported video file. GA5 is trying to comb through all those frames, and create a global palette that can be used by all frames. So, it's looking for 256 colors (or less, depending on the settings) it can use for all frames. So on those massive animations, it could choke.
We can get around that:
Click File, Optimization Wizard...
In the section where it says, "Do you want to create a Global Opimized Palette to be used by all frames in the animation?" select No. Click Next.

From here on, you can set the rest of the parameters to your liking. It should work.
We're done!


![]()
![]()
![]()